How to Detect Identity Breaches (Before It’s Too Late)
The faster an identity breach is detected, the faster an organization can take steps to reduce the impact of the data breach. Faster detection times and notifications to impacted staff and organizations can result in lower data breach recovery costs and help save a company’s reputation.
Identity breaches are a type of data leak in which employee identities and credentials have been stolen or exposed, which could potentially cripple an entire organization or cause severe financial and reputational damage. With billions of pages on the internet to scan, it’s imperative for organizations to employ an internal identity breach detection tool or service, such as UpGuard Breach Risk.
UpGuard offers an Identity Breach module within its Breach Risk product to help organizations identify any third-party identity breaches that have been exposed on the internet, what information has been exposed, and the scope of the security breach.
What is an Identity Breach?
An identity breach is a cybercrime attack where a hacker or cybercriminal obtains sensitive information, like personally identifiable information (PII), social security numbers, financial information, credit card information, login credentials, or medical and patient data, through criminal means. Threat actors may use any number of methods to breach identities, most commonly through:
- Ransomware attacks
- Phishing attacks
- Social engineering scams
- Malware attacks
- Brute-force hacking
- Recovery of improperly disposed of computer devices or sensitive documents
- Physical theft of company devices
Once the identity has been exposed or stolen, hackers can use the stolen legitimate credentials to access an organization’s most important data. Once the hacker is in the network and systems, it can be much harder to detect as access will seem legitimate and authorized.
Identity Breach vs. Identity Theft
Identity breaches and identity theft are very similar, with one major difference — breaches are typically much wider in scope and are carried out using cyber attack means. Breaches can affect entire companies when employee credentials have been exposed, and organizational systems and assets are put at risk. If sensitive data is successfully stolen or exfiltrated, cybercriminals can attempt to ransom that data back to the business, sell it on the dark web, or expose it to the public.
Identity theft is typically confined to a single individual where stolen personal data is used to commit fraud or theft. Although the impact is usually much smaller, identity theft damage can still be extremely severe, depending on the status of the compromised individual. In most cases, identity thieves seek to steal identities for monetary reasons.
How To Detect Identity Breaches
Identity breaches can occur through various physical or digital methods so it’s important to recognize early signs of a breach so that you can report it to the relevant authorities and company executives. Some of the most common signs a breach has affected you are:
- Improper access of restricted data, assets, or systems
- Suspicious network and user activity
- Sudden spike in download activity or repeated attempts to access restricted data
- Hacked or stolen credentials leading to unauthorized authentication notifications
- Irregular communications with other individuals or coworkers
- Unusual demands or requests from executives or other coworkers
- Exposed credentials surfacing on public or dark web forums
- Identity breach reports from internal attack surface monitoring tools
Detecting Identity Breaches with UpGuard Breach Risk
Having a dedicated cybersecurity solution to manage internal attack surfaces can help companies detect identity breaches much faster, save countless hours, and most importantly, prevent costly recovery and remediation from exposed data. Dedicated solutions, such as UpGuard Breach Risk, help organizations gain better visibility of their entire risk profile, allowing them to initiate risk mitigation and remediation processes early on.

UpGuard Breach Risk’s Identity Breach module crawls the internet for third-party data breaches and identifies where an employee’s credentials have been exposed in real-time. All identified matches are automatically populated within the module including the following data points:
- Name of breached company
- Breach details
- Severity of breach
- Date of breach
- Date published
- Total employees involved
- Total VIPs involved
- Type and amount of data exposed
- Notifications sent
- Current breach status
Understanding Breach Severity Classification
Each potential identity breach report is classified by four main risk severity levels:
- Critical - Passwords, historical passwords, authentication tokens, and biometric data
- High - Usernames, security questions, banking PINs, private messages, government-issued IDs, emails, credit cards, passport numbers, password hints, cryptocurrency wallet hashes, and social security numbers.
- Medium - Dates of birth, phone numbers, physical addresses, partial credit card data, bank account numbers, IMEI numbers, recovery email addresses, password strengths, credit card CVVs, address book contacts, and audio recordings.
- Low - Low-level personal data, including email addresses, names, education, job titles, income, ethnicity, gender, asset ownership information, tax records, insurance information, web browsing history, device information, and more.
Each breach is labeled with the highest severity of the data that has been exposed — multiple instances or data types of Low severity and one instance of Critical severity from one breach will be classified as a Critical-level breach.
Viewing Identity Breach Data
Under the Identity Breaches module, there are three ways to view the data:
- View by breach
- View by email
- VIP list
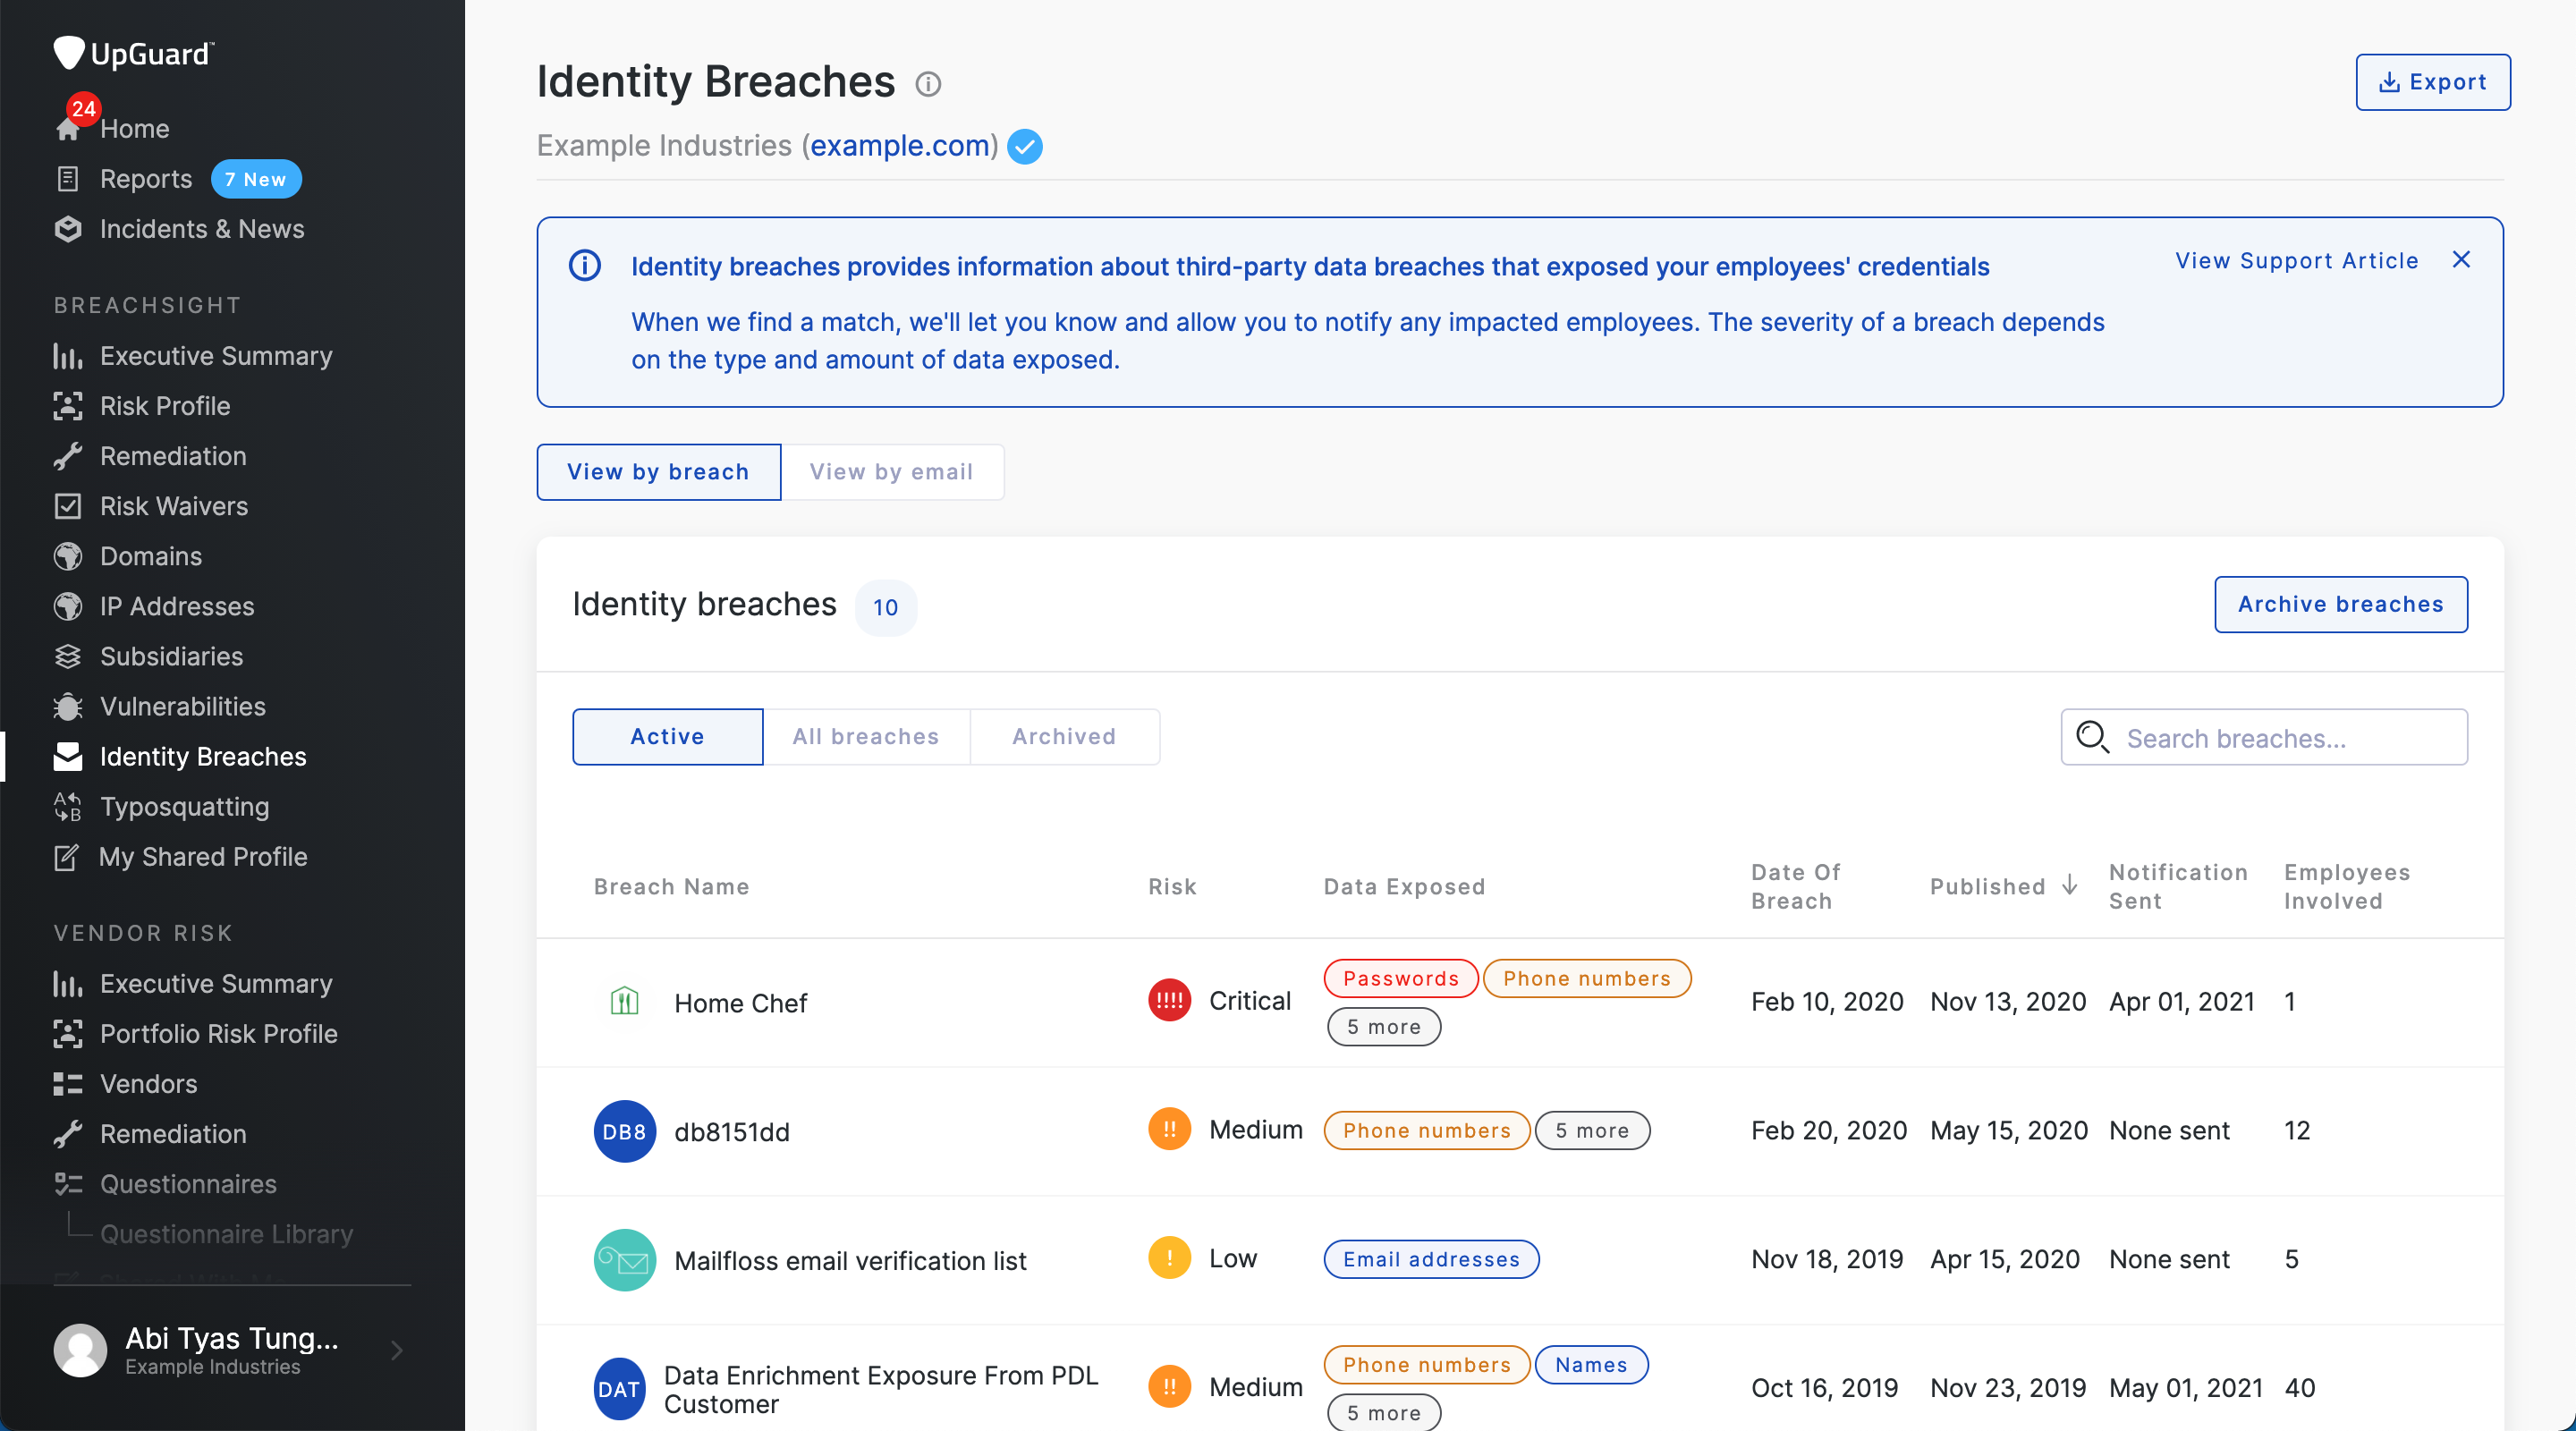
View by breach
The “View by breach” tab can show a comprehensive list of all the instances of identity that may have been exposed within the organization. Each individual breach contains a list of all the email addresses that are involved with the exposure, including pertinent breach details, such as severity, employees involved, current breach status, and type of data exposed.
Companies will have the option to archive or ignore a specific breach using the “Archive breaches” button if they feel that the identified breach is not a risk.

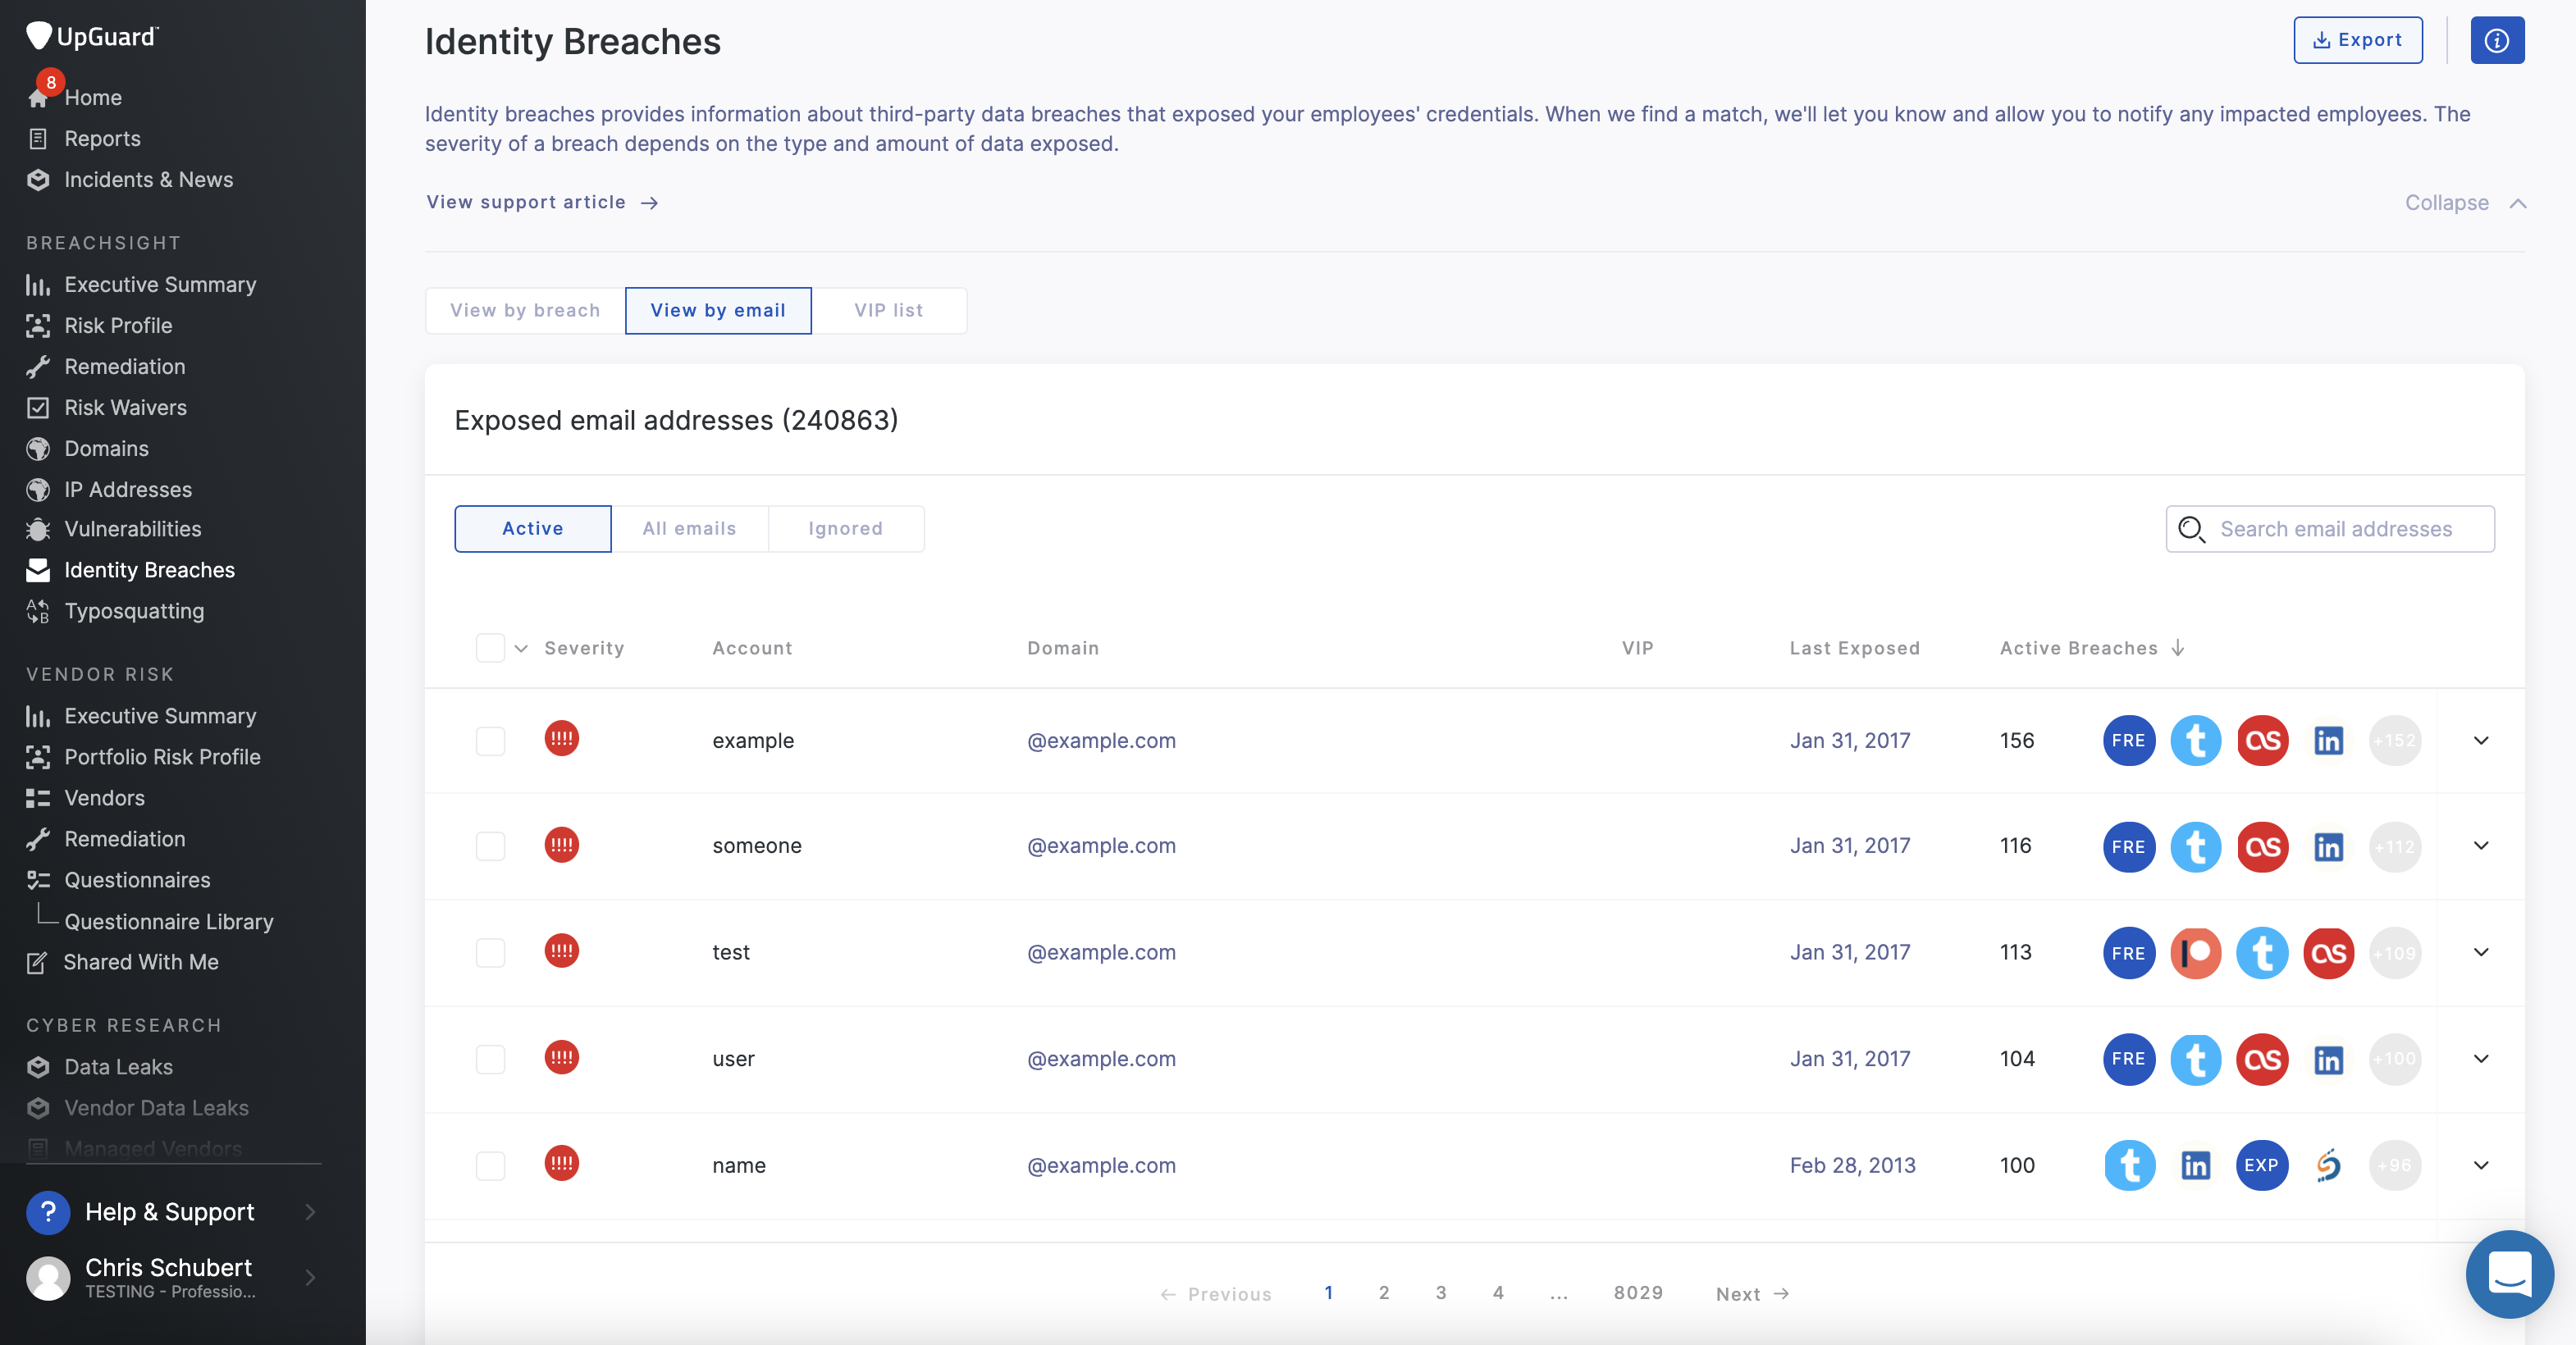
View by email
Instead of viewing each breach, UpGuard users can organize the Breach Report by viewing all of the email addresses that are part of the data breach. The “Exposed Email Address” list will exclude all related email addresses from the specific breach that has been archived and ignored.
In some cases, email addresses will be associated with multiple breaches, which users will be able to view once they select the email address in the list. Users will also be able to use the “Ignore email addresses” button to remove any emails that are no longer active or relevant, such as those from former employees or deactivated emails. Each email in the list will have a “Notify Employee” button to send a message to the affected employee about the compromised email.
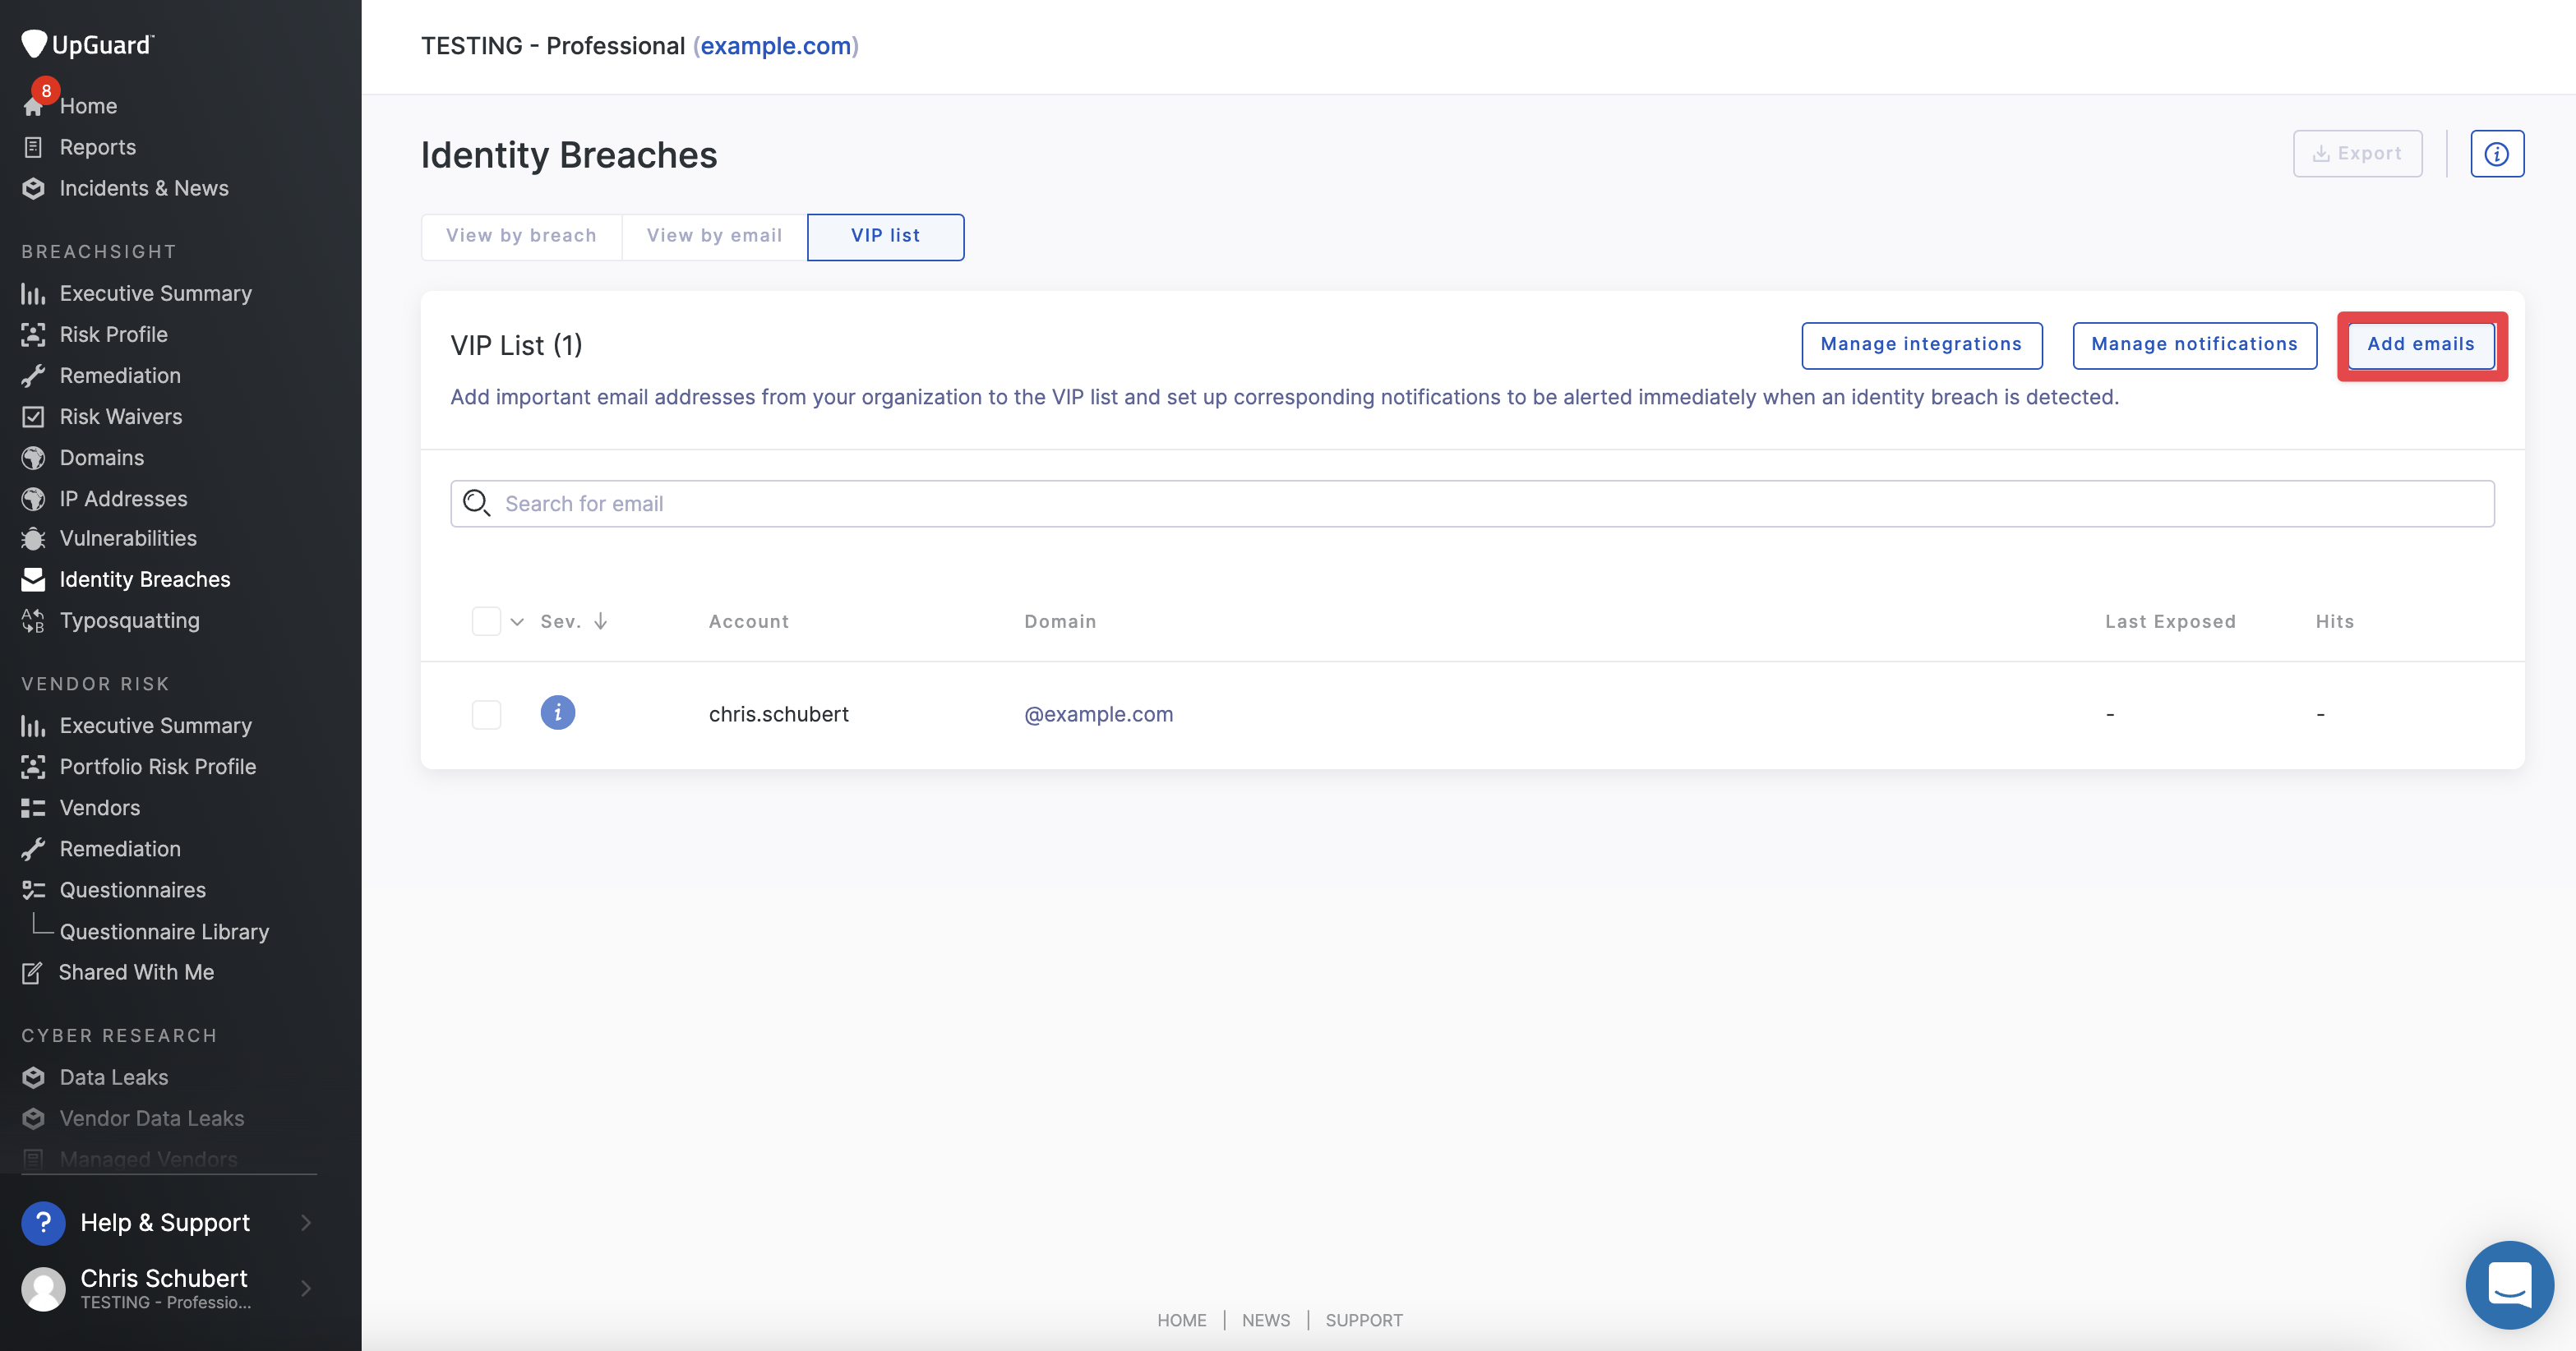
VIP List
VIP lists can be tagged from the email or breach views or manually added to see how much identity breaches the email was involved in and the severity level of the breach. Users can click the "Add emails" button in the top right to manually add VIP entries
Notifications can also be configured and set up to automatically notify any VIPs if they are involved in a breach.
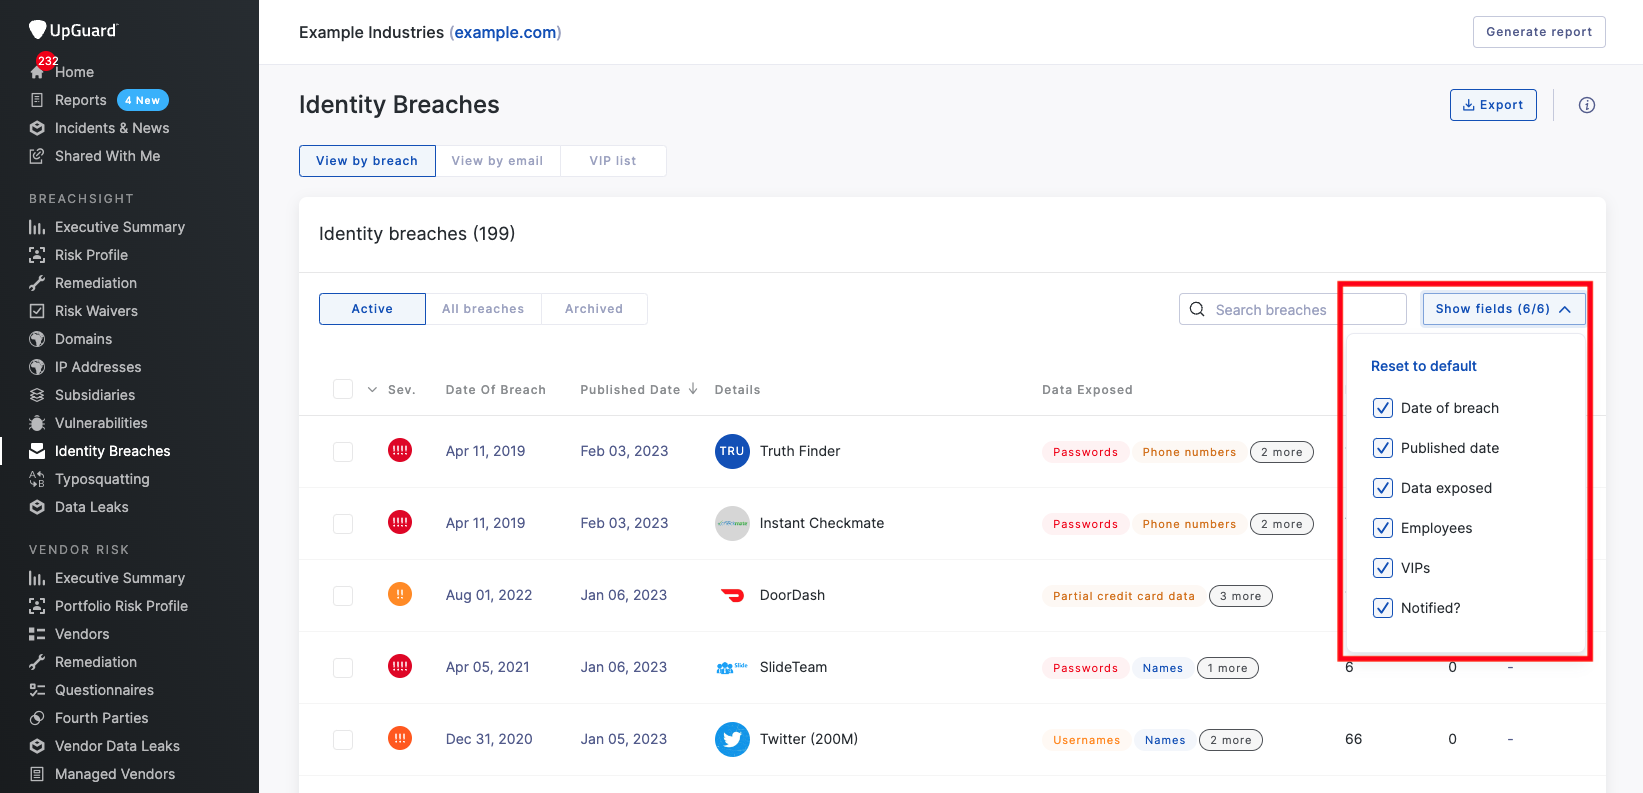
Configuring Identity Breaches View
The view in the dashboard under Identity Breaches can be configured to show or hide columns using the “Show Fields” button on the right hand side. Currently, users can filter the view through six fields:
- Date of breach
- Published data
- Data exposed
- Employees
- VIPs
- Notified?
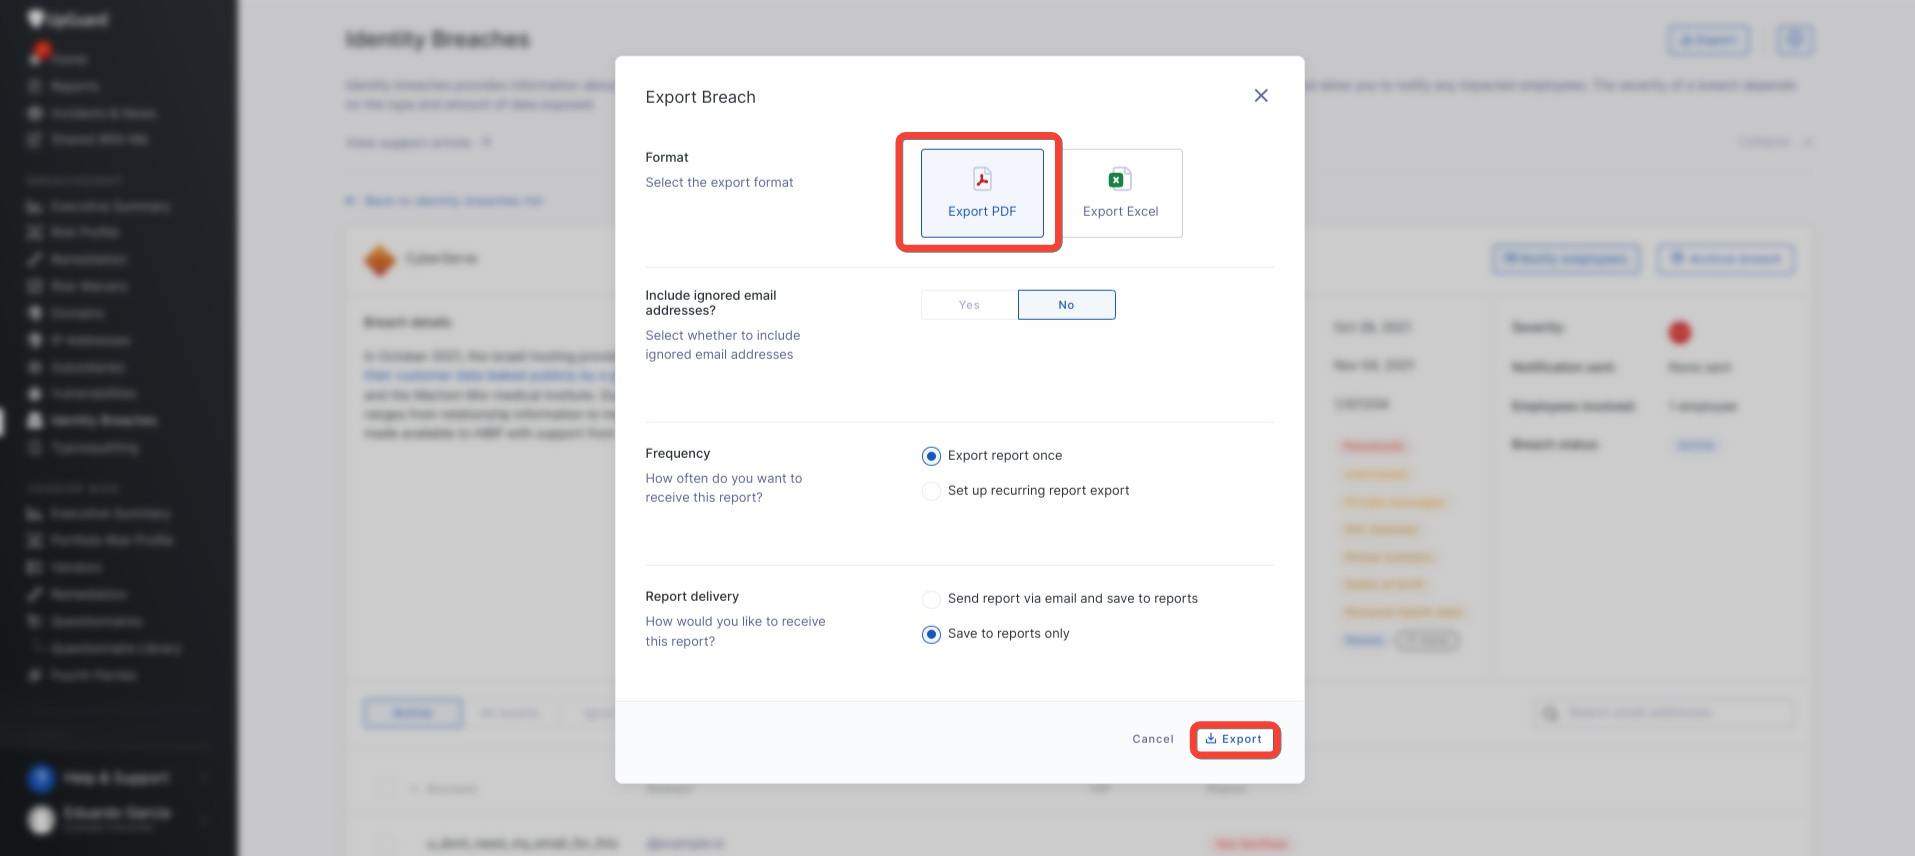
How to Export an Individual Identity Breach
Users that want to share individual Identity Breach reports internally can export them as a PDF document or Excel sheet.
To do so, users must first click into the specific breach they want to export and click the “Export” button in the top right. Users will then have the option to choose between exporting as a PDF file or an Excel document. Additional options include setting up a recurring report and report delivery via email.