What is SPF Filtering and How Do I Implement It?
People fall victim to internet scams, not because they're exceedingly credulous, but because scammer efforts are becoming more and more believable. Now, cybercriminals can leverage your hard-earned reputation by sending emails that appear to come from your business.
Victims of this spoofing attack could suffer irrevocable reputation damage or get their IP address blacklisted, putting an instant end to all online business activities.
To learn how to protect your business from this serious threat, read on.
What is an SPF Record for Email?
To protect your domain from spoof emails, you need to have an SPF record in place.
An SPF record, or Sender Policy Framework record, is an email authentication method of specifying all of the servers permitted to send emails on your behalf. When an email supported by an SPF record is sent, the recipient's server checks whether the sender's IP address is authorized to send emails with the displayed domain name.
An SPF record is a type of spam filter that tells receiving email servers that an email is legitimate and not spoofed. For your emails to have the most accurate anti-spam qualifiers, you should combine your SPF record with a DKIM and DMARC record (more on that shortly).
For more detail information on the Sender Policy Framework, refer to document RFC 7208.
What is SPF Filtering?
SPF filtering is the process of ensuring that all received emails are legitimately from the specific domain sending them. SPF filtering mitigates sender address forgery by evaluating all emails against your SPF policy.
Not all email servers have SPF filtering capabilities, but this functionality is likely to become prevalent in the future as the threat of email spoofing continues to rise.
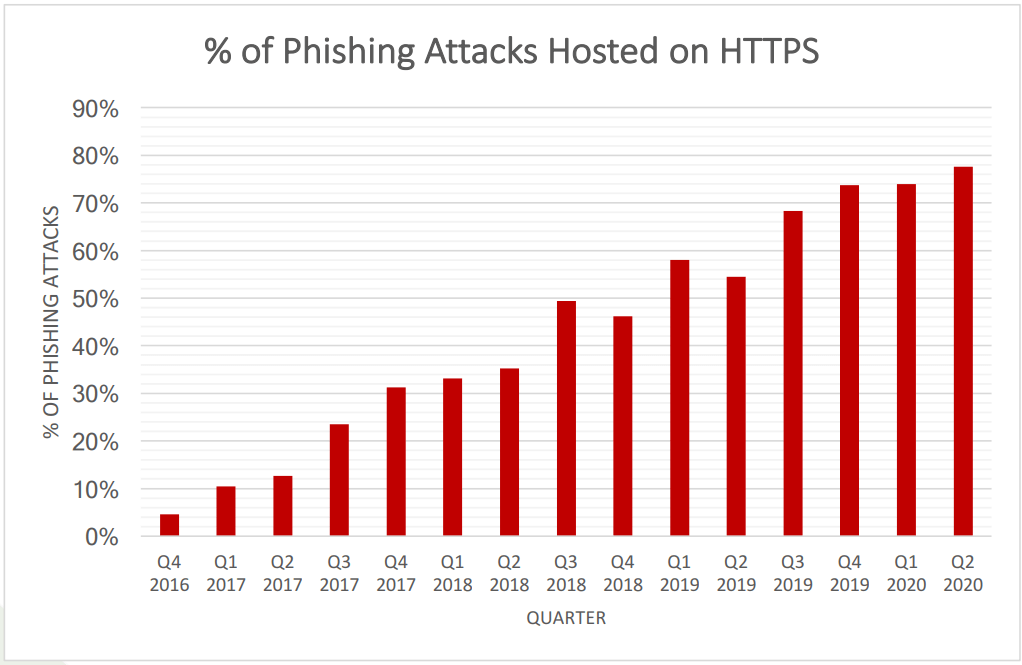
Email spoofing campaigns are usually platforms for phishing attacks and this cybersecurity threat is on a concerning upward trend.
How is an SPF Record Used?
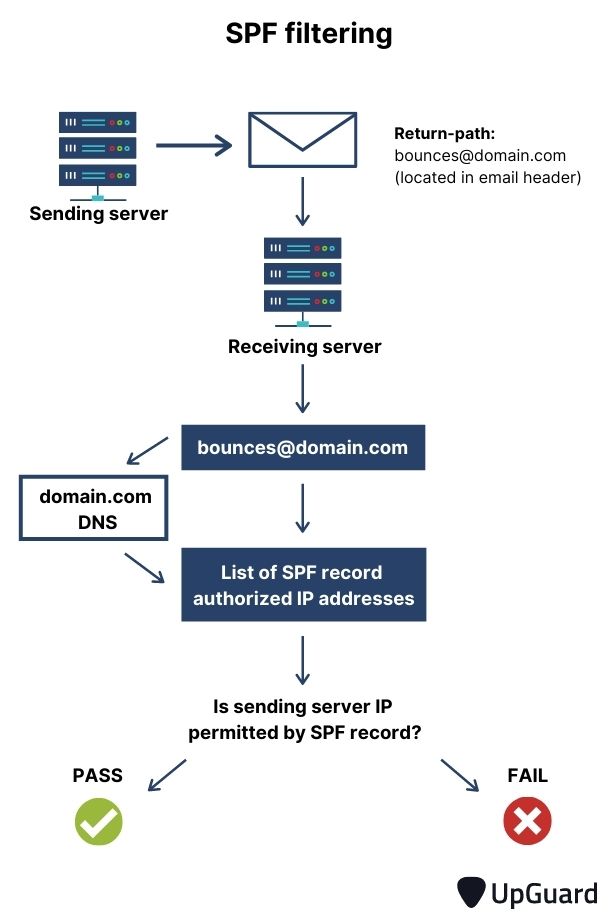
To understand how an SPF record is used, it's important to first understand the journey of an email from the sending server to receiving server.
Here's a simplified break down of the process:
Step 1: The sending mail server sends the email.
Step 2: The receiving mail server analyzes the return-path email address within the header of the email. When a receiving server experiences a delivery issue (like a bounce), it uses this return-path email address to notify the sending server of the issue.
Step 3: The receiving mail server identifies the domain within the return-path domain.
Step 4: The receiving mail server accesses the SPF record of the domain being claimed in the email communication.
Step 5: The IP address of the sent email is compared to the list of permitted IP addresses in the domain's SPF record.
Step 6: The sent mail either passes or fails an SPF check, depending on whether its IP address is listed in the SPF record.
This process is summarized in the graphic below:
How to Create an SPF Record
An SPF record is a one line TXT record that's added to your DNS, or the Domain Name System. Refer to the list below for instructions on how to access the DNS record of popular web hosts.
- How to edit DNS settings with Squarespace
- How to edit DNS settings with Wix
- How to edit DNS settings with GoDaddy
- How to edit DNS settings with Amazon Web Services
- How to edit DNS settings with Dreamhost
- How to edit DNS settings with Hostgator
- How to edit DNS settings for Google Domains
Here are a couple of SPF record examples:
- TXT @ v=spf1 ip4:1.4.3.5 ip4:1.3.6.9 include:third_party_example.com -all
- TXT @ "v=spf1 a include:_spf.google.com ~all"
Before creating an SPF record, you should check whether you already have one in place. Use this online tool to see which email servers are currently authorized to send emails on behalf of your domain.
To create an SPF record, you need to understand how to interpret SPF record syntax.
- TXT: This specifies the DNS record type as a TXT record
- v-spf1: Identifies the TXT record as an SPF record. The number at the end denotes the version of the SPF record. I.e. "SPF version 1"
- @: This symbol represents the current domain
- a: Refers to all of the domains listed in your DNS A record authorized to send emails on your behalf
- mx: The MX record lists all of the servers permitted to send emails. The receiving email server checks MX records in order of set priority.
- IP address: The list of IPV4 addresses permitted to send emails on behalf of the domain owner (see example 1 above). This could be an IPV4 or IPv6 address range.
- Include: Specifies the sending domains permitted to send emails. The first SPF record example above specifies the name of the third party domain being used to send emails on the company's behalf. In the second example, all email addresses with the domain "google.com" are authorized to send emails on the company's behalf.
- all: SPF records are tied off with an "all" statement. The "~" prefix denotes a 'soft fail.' This means if the receiving email fails the test, it's still accepted but tagged as non-compliant. A "-" prefix denotes a hard fail that rejects all incoming mail that does not meet the specified conditions.
If you are using a third party to send emails they should provide you with their unique SPF record documentation. Here's an example of the SPF record instructions specified by Amazon's Simple Email Service (SES):
"v=spf1 include:amazonses.com ~all"
If your email client has not provided SPF record documentation, here's a process for specifying simple SPF filtering conditions.
Step 1: List all permitted IP addresses
Start by specifying the version of SPF you are referring to. Most SPF TXT records are version 1:
v=spf1
If you have a list of authorized IP addresses, they should directly follow this SPF version entity.
You can either specify each IPV4(32 bit) or IPv6 address(128 bit) or a range.:
For example:
v=spf1 ip4:1.2.3.4 ip4:2.3.4.5 (individual IP addresses specified).
v=spf1ip6:3FFE:0000:0000:0001:0200:F8FF:FE75:50DF (IP address range specified).
Step 2: Specify third-party email service domain name
If you are using a third-party email provider, you should specify it after your authorized IP list with an 'include:' prefix.
For example:
v=spf1 ip4:1.4.3.5 ip4:1.3.6.9 include:third_party_example.com
You could just specify an authorized domain name without listing specific IP addresses.
For example:
v=spf1 include:_spf.google.com
Step 3: Specify an 'all' tag
To complete your SPF record, you need to specify an 'all' tag. The specific function of the 'all' tag is dependant upon its prefix. For the best security, you should specify a hard fail with a '-' prefix.
For example:
v=spf1 ip4:1.4.3.5 ip4:1.3.6.9 include:third_party_example.com -all
Or
v=spf1 include:_spf.google.com -all
If your domain does not send any emails, you can prevent all incoming mail servers from accepting emails form your domain with the following SPF record:
v=spf1 -all
It's important to keep the following SPF record creation limitations in mind:
- You are limited to only 10 lookups
A lookup is an authorization check. Entities "a", "mx" and "include" constitute a lookup. You must, therefore, ensure that the total entries in each of these entities does not exceed 10. Exceeding this threshold may result in your email ending up in the recipient's spam folder. - You are limited to only 255 characters
Your entire SPF TXT record cannot exceed 255 characters. This includes any specified IP addresses.
How to Prevent Email Spammers from Using Your Domain
To best protect your domain from email spoofing, you should cannot solely rely on a single email authentication method.
Besides an SPF record, you also need to establish the following validation methods:
- DKIM
- DMARC
These authentication layers work together with your SPF record to create powerful spam filtering conditions. This fusion will ensure your marketing emails have the highest chances of not ending up in the spam folder.
What is DKIM?
DKIM or Domain Key Identification Mail, embeds a hidden authentication signature into all sent mail. A DKIM signature confirms to receiving servers that the email is authentic and that none of its components have been modified.
Setting up DKIM will dramatically improve the quality of all your sent mail.
Refer to the list below for instructions on how to set up DKIM for popular email clients.
What is DMARC?
DMAC, or Domain-based Message Authentication Reporting and Conformance, is a protocol that enforces both SPF record and DKIM authentication.
By enforcing this two-layer authentication process, a DMARC record will ensure your sent email will be of the highest quality, which will give you the best chances of not ending up in the spam folder.
How to Setup DMARC Record
A DMARC record doesn't just enforce SPF and DKIM authentication. With this record, you can specify the desired action when an email fails SPF and DKIM authentication. You could set receiving servers to reject failed emails and activate the automatic sending of activity reports to keep track of all suspicious email message activities.
Follow these steps to set up a common DMARC record for your DNS.
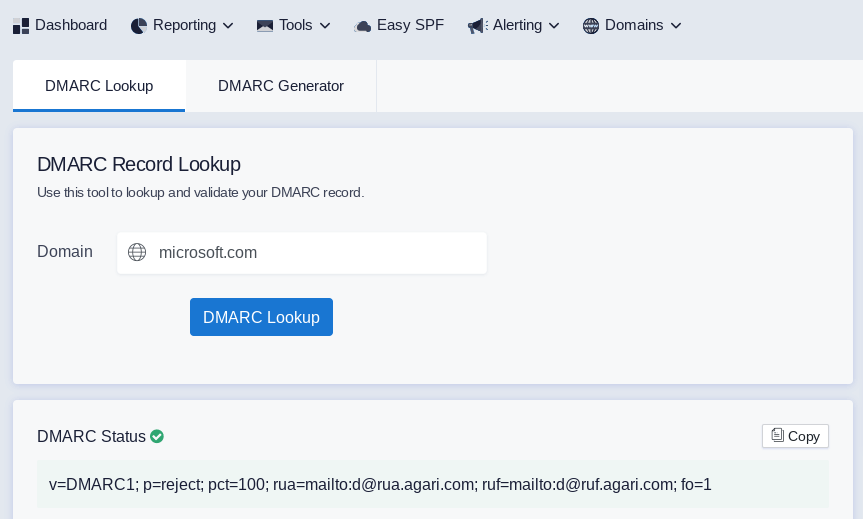
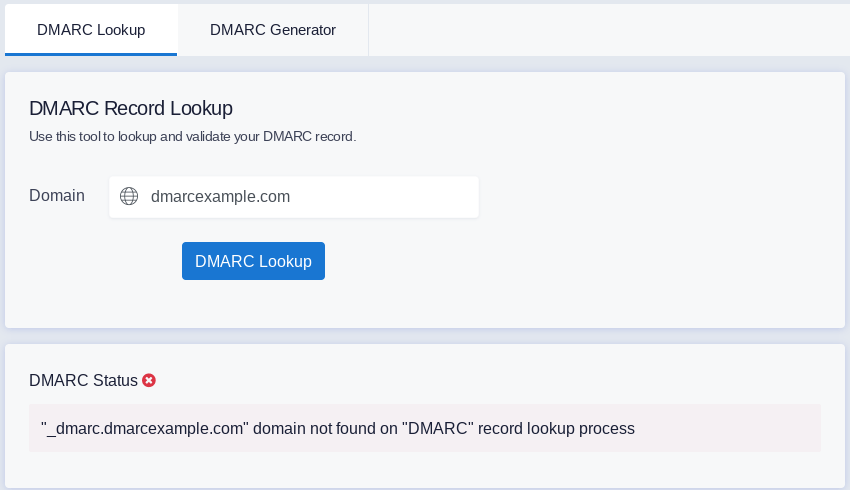
Step 1: Check whether you have a DMARC record
Click here to load the DMARC record lookup tool by Easy DMARC.
Type your domain in the search field and click "DMARC Lookup"
If your domain has a DMARC record, it will be displayed in the search result.
As you can see, microsoft.com has a DMARC record:
If your website doesn't have a DMARC record, you will see a negative DMARC status as follows:
Step 2: Generate a DMARC record
Click here to load the DMARC record generator by Easy DMARC.
Apply the following settings:
- Set the Policy type to "Reject" - this will reject all emails that do not meet your specified SPF record and DKIM record requirements
- Input the email you want email reports sent to in the Aggregate rerporing field. You can list multiple email addresses separated by a comma
- The "Sub Domain policy type" is usually the same as your specified Policy type
- DKIM identifier alignment: Relaxed
- SPF identifier alignment: Relaxed
- Percentage applied to: 100
- Reporting interval: 86400
- Failure reporting status: 1 - This will send you a report when an email doesn't pass DKIM or SPF authentication.
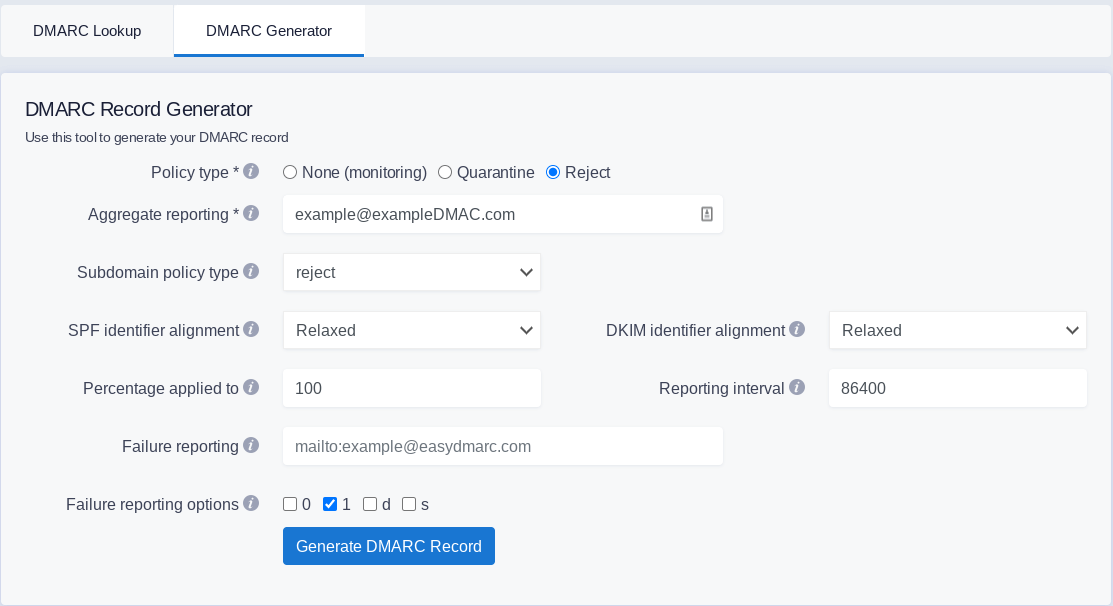
When these settings are applied, click "Generate DMARC Record."
Step 3: Insert DMARC record into your domain DNS.
Copy the generated DMARC record and insert it as a TXT record into your domain DNS. The process of inserting a DMARC record into your DNS is the same as insertng an SPF record.